The first step we need to perform is creating a service principal and generating a client ID and secret, which affects a username and password:
- Navigate to the Azure portal at https://portal.azure.com.
- In the top search bar, search for and select Azure Active Directory.
- On the left-hand menu, click App registrations.
- Click +New registration.
- On the Register and application page, enter a friendly name to refer to your app – for example, SecureWebApp.
- Choose the account type; for now, leave the default of Accounts in this organizational directory only.
- Click Register.
- You will be taken to the Overview page for your new service principal; make a note of the Application (client) ID – as in the following example:
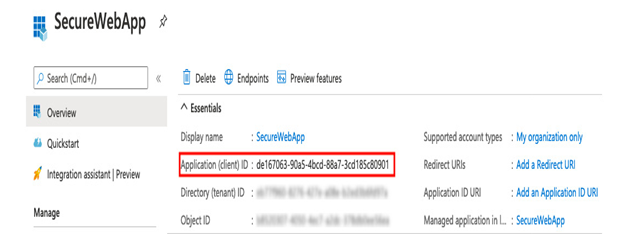
Figure 6.4 – Creating a service principal
- On the left-hand menu, click Certificates & Secrets.
- Click + New client secret.
- Give the secret a name such as WebAppAccess; leave the expiration at one year.
- Copy the client secret – this is also used in your web app. See the following figure for an example:
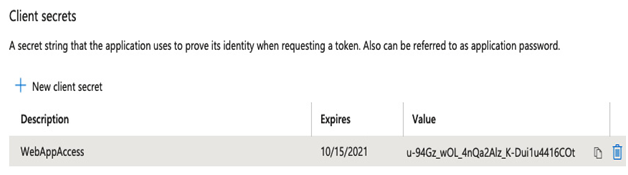
Figure 6.5 – Security Principal secret
The next step is to create an access policy to allow the security principal we have just created to read secrets, and then finally, we will create our secret.
Setting the access policy
Now we have a service principal, we need to define and assign an access policy to it:
- Navigate to the Azure portal at https://portal.azure.com.
- In the top search bar, search for and select Key vaults.
- Click on your key vault.
- On the Overview page, copy down the Vault URI – this is the final piece of information we will need, along with the client ID and client secret. See the following example:
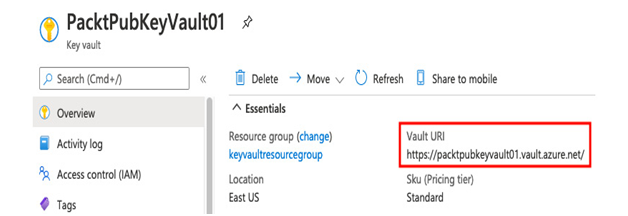
Figure 6.6 – Getting the key vault URI
- On the left-hand menu, click Access policies.
- Click Add Access policy.
- Click the drop-down list under Configure from template and choose Secret Management.
- Under Select principal, click None selected. Search for the name of the service principal you created in the previous section – Creating the service principal. See the example in the following figure. Click Select.
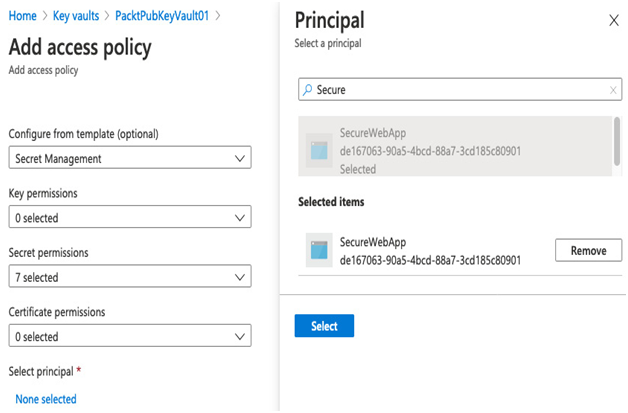
Figure 6.7 – Assigning the access policy
- Click Add.
- From the top menu, click Save.
- On the left-hand menu, click Secrets.
- Click Generate/Import.
- Complete the following details:
a) Upload options: Manual.
b) Name: SecureConnectionString.
c) Value: AreallySecureConnectionString (details will be masked). - Click Create.
The final step in the process is to use the service principal we have just created within a web app to access the secret.